Lake Villa Improvements Year 5 (2024)
Main Bathroom Remodel

In the Spring of 2024, before we could work outside, we decided to remodel our main floor bathroom. Unfortunately, I did not take a picture of what it looked like before we started. So here's what it looked like after we removed the vanity and sink.

Main Bathroom Remodel
Here's the same angle, but with the vinyl planks almost completely installed. These are actually floor planks but we glued and nailed them to the walls
Main Bathroom Remodel
With the walls completed, I installed the new sink. Next, we would replace the light fixture.

Main Bathroom Remodel
We masked off the new wall planks and began painting the wall areas around the space before we installed the new light fixture, shown here.

Main Bathroom Remodel
When we went to install the vanity, it hit the new light fixture. And we couldn't lower it because it was already sitting on top of the wall trim.
So we hired an electrician to come in and raise the electrical box up about 2 inches.

Main Bathroom Remodel
After he left, I put in the piece of drywall that he cut out and I began to repair the wall.

Main Bathroom Remodel
And here is the completed electrical repair job. The mud was still a bit damp when I took the picture.

Main Bathroom Remodel
Here's what the final product looks like, before adding decorations.

Main Bathroom Remodel

Here's a shot of the outlet and switches with their new covers. The towel ring still needs to be moved and replaced with a towel rack.
Main Bathroom Remodel
The old towel holder has been removed and the wall patched, and the new paper towel rack installed.

Main Bathroom Remodel

Here's the primary wall with decor added.
Main Bathroom Remodel
The west wall with decor.

Main Bathroom Remodel

And the final wall with decor. The left side is empty because that's where the door goes when opened.
Rectangular Garden
With the arrival of the warm weather, I started on the construction of a large rectangular garden that would include the two redbud trees that we planted late last year. I hired a contractor to trench it out for me and haul away the grass and dirt.

Rectangular Garden

I wanted to get a better idea of how high I needed to go, so I did two low sides first, then stacked the blocks without gluing them down, just in case they needed to be moved.
Rectangular Garden
Then, I moved on to the third side, stacking them to the desired height.

Rectangular Garden

Getting the fourth and final side in was a bit tricky. It had to align with the heights of the first and third sides, and its length had to end at the exact beginning of the other sides. As you can see, it was a tad wiggly, so I had to redo it.
Rectangular Garden

We first tried to stair step the blocks, so that it would match the driveway. However, this just didn't look right, so we had to keep going.
Rectangular Garden
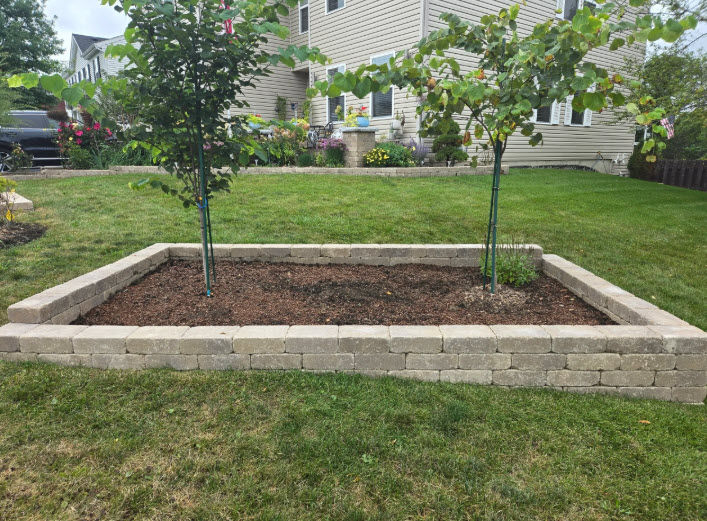
In the final result, we did do one step so it wouldn't be too high on the bottom right corner, which we felt was higher than what we really wanted anyway. But I think it looks nice.
Two Square Gardens
In this image, you can barely see the existing circular garden that was already there, and looked like crap. So I started on making a square garden next to it. I trenched the four sides, then began laying down the gravel and sand for the first row of blocks.

Two Square Gardens

The first row is put in and leveled.
Two Square Gardens

Here you can see that I was almost finished with gluing down the second and final row, when the rain stopped me from completing this one. I had to wait until the following weekend to finish this one.
Two Square Gardens
Here is the final image of the second square garden, which is inline with the sidewalk and the first square garden.


The final project for the year, was to replace the wood slats in the gate with the same metal ones that I used for the railings, then paint it to match!
Gate Upgrade
